In this article, you are going to see about the step by step approach of how to perform the distributed testing in JMeter 5.3 version.
Distributed testing in JMeter will be performed to handle the test execution by sending the request to the target server with the help of master and slave instances. In order to interact with the distributed network, JMeter uses java RMI (Remote Method Invocation).
Prerequisites for Distributed Testing in JMeter 5.3:
- Master and slave machines should be on the same network.
- Firewalls on all the machines should be turned off.
- Versions of JRE, JDK and JMeter should be same in master and slave machines.
- Check the availability of the port in the jmeter-server.log by running the jmeter-server.bat.
The following settings need to be configured in master and slave machines before test execution.
Configuration Settings in Master Machine:
Step-1: Setting up the remote host
- Go to the JMeter bin folder and open the jmeter.properties file using notepad or notepad++

- Go to the Remote hosts and RMI configuration and add all the IPs of slave machines in the remote_hosts separated by commas. In the below screenshot you can see 10.111.222.333 and 10.111.222.444 slave machines are added.

- Search for server.rmi.ssl.disable in the jmeter.properties file. Enable this setting and change the value to ‘true’ for a successful handshake.

Step-2: Check for keytool
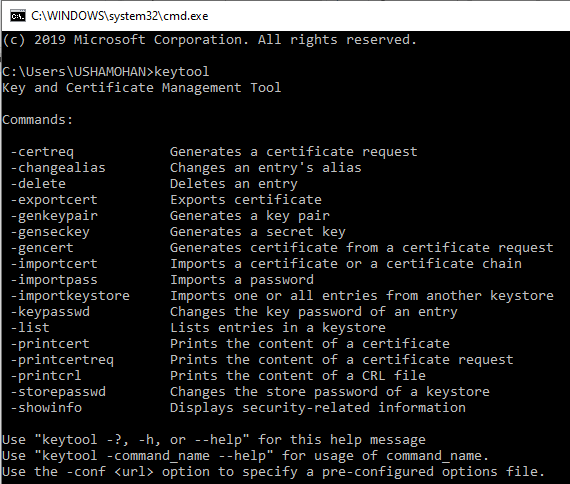
- Go to the command window and type keytool, after pressing enter you need to see this

- If keytool is not available then you need to set the path of JRE and JDK in the environment variables.
- If keytool is available you can go for step-4 by skipping step-3.
Step-3: Setting path in Environment variables
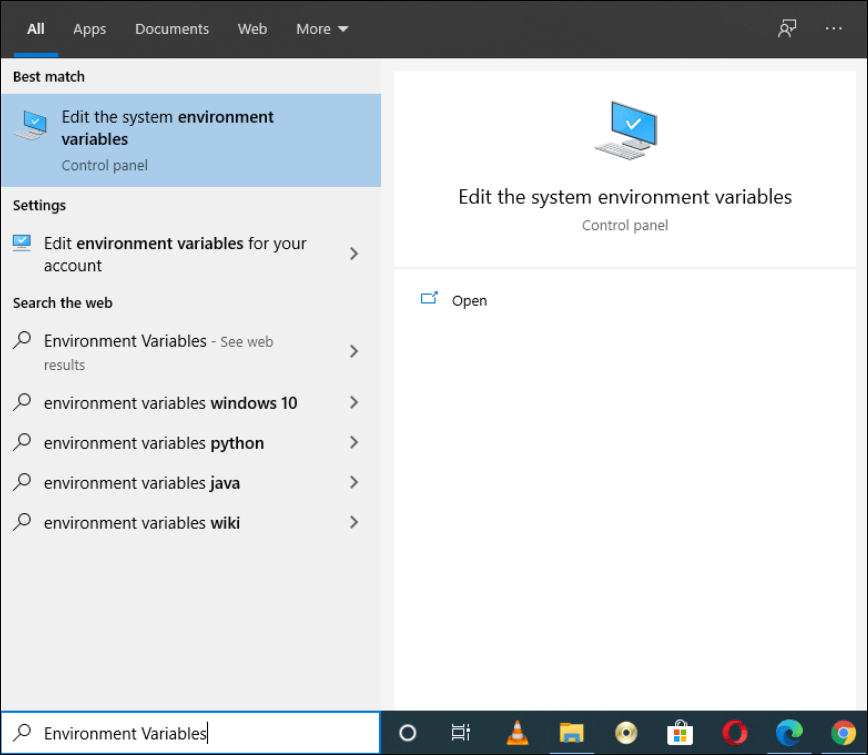
- Go to Type here to search in windows and type Environment Variables and click on open.

- Go to the Advanced tab
- Click on the Environmental Variables

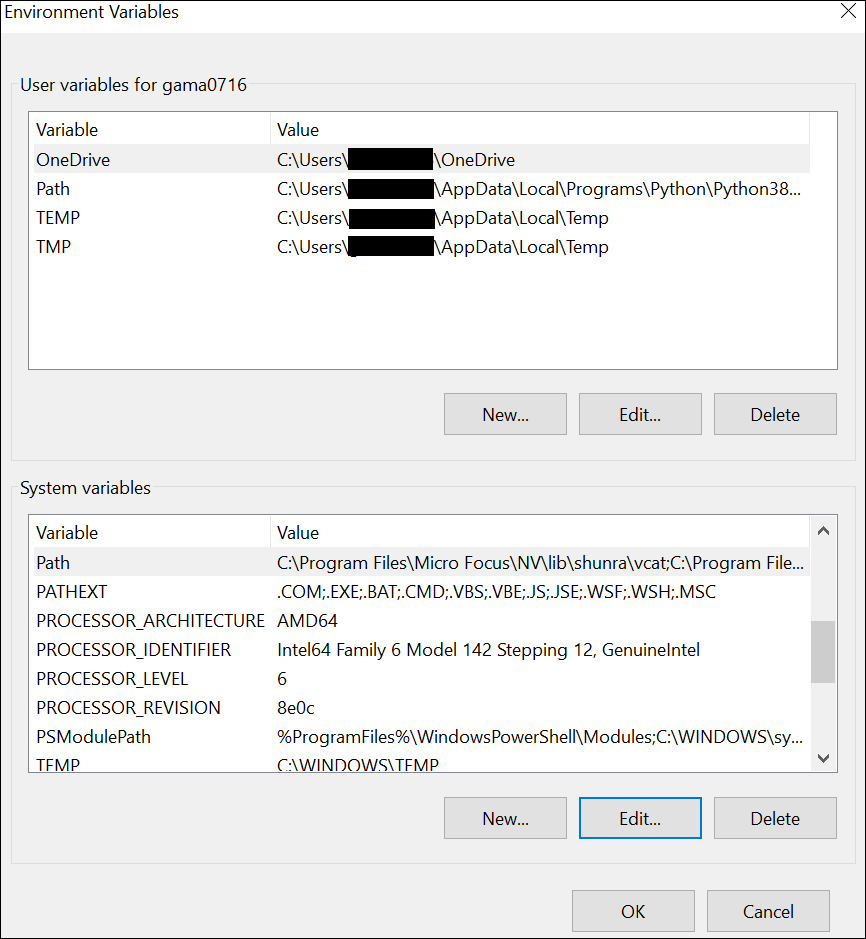
- Go to system variables, search and select the Path variable and click on ‘Edit…’ button.

- Click on New

- Add the path of both jre and jdk. After adding path click on OK.

Step-4: Creating rmi_keystore.jks file
- Go to JMeter bin folder and double click on create-rmi-keystore.bat file. It will open a command window. In case, the window just pops-up and closes then check whether rmi_keystore.jks file already exists, if so then delete it first and then again double click on create-rmi-keystore.bat file.
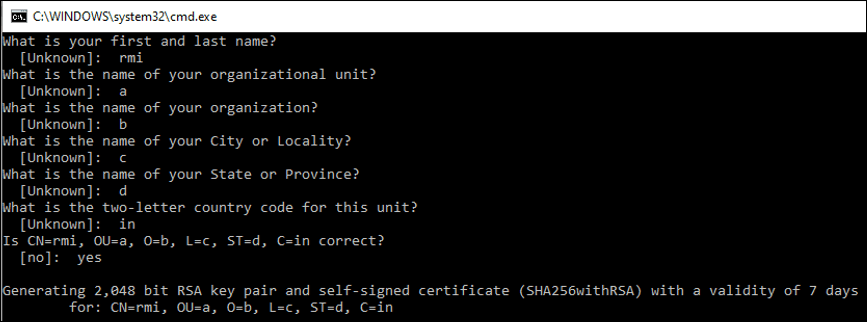
- Once the window is opened then fill the details:
- What is your first and last name? – rmi
- What is the name of your organizational unit? – (It could be any)
- What is the name of your organization?- (It could be any)
- What is the name of your City or Locality?- (It could be any)
- What is the name of your State or Province?- (It could be any)
- What is the two-letter country code for this unit?- (It could be any two letters)
- Is CN=rmi, OU=<YourAnswer>, O=<YourAnswer>, L=<YourAnswer>, ST=<YourAnswer>, C=<YourAnswer> correct? – yes

Note:
- Keeping first and last name as rmi.
- In case, you are prompt for the password then provide changeit as a password.
- Check whether rmi_keystore.jks file is generated or not in the /bin folder of Apache JMeter.
Configuration Settings in the Slave Machine:
Step-1: Copy rmi_keystore.jks key which was generated in Master machine in all the slave machines.
Step-2: Giving path for rmiregistry
- Go to the JMeter bin folder and open the jmeter-server.bat using notepad/notepad++

- Search for START rmiregistry and give the path of jre.
Note: You may have different path so provide the correct path as per your system.

Step-3: Setting SSL
- Search for server.rmi.ssl.disable in the jmeter.properties file. Enable this setting and change the value to ‘true’ for a successful handshake.

Test Execution Process:
Step-1: Start the server in slave machine. You need to get a command window like this

Step-2: Start JMeter in Master machine and open the required jmx file.
Step-3: Click on the ‘Run’ tab and go to the ‘Remote Start’ option and verify the slave machine IP address.

Step-4: Close the JMeter and open the command window to run the test in Non-GUI mode.
Step-5: In order to run the JMeter in non-gui mode, use the following commands
- In order to run the test on all the servers mentioned in the remote_hosts, use this command
C:\apache-jmeter-5.3\bin>jmeter -n -t myScript.jmx -r
- In order to run the test on specific servers from the remote_hosts, use this command
C:\apache-jmeter-5.3\bin>jmeter -n -t myScript.jmx -R 10.111.222.333
Step-6: Verify the test execution in the slave machines. You can observe test initiation and completion like this.
Confirmation of successful test start:
- At Master End:

- At Slave End:

You may be interested:
Challenges in distributed testing:


I wonder if its the same procedure for remote testing when it comes to Jmeter version 5.4..
I followed all of the instructions but when I started the master machine it would start the test but it never ended the test? I waited some time but no impact…