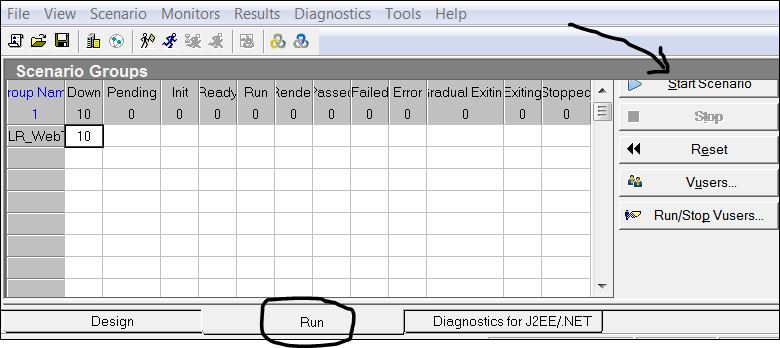
On the completion of test scenario preparation work either manually or goal-oriented the next task is to execute the scenario or test. To execute the scenario you need to go to the ‘Run’ tab of the controller and then click the ‘Start Scenario’ button.
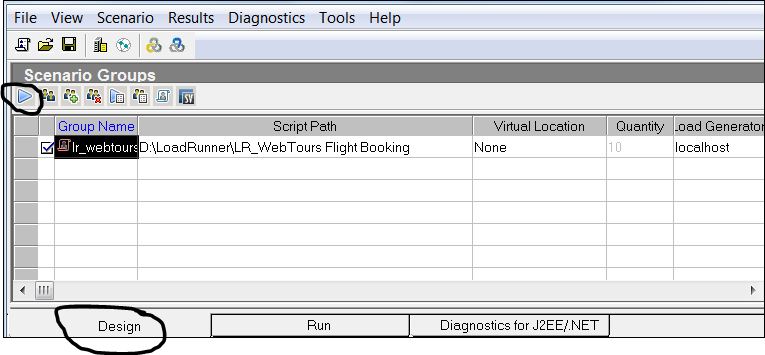
You can also start the scenario from the ‘Design’ tab just by clicking the ‘Start’ button as shown below figure:
Before starting the scenario all the users are in a ‘Down’ state. There are various states of Vuser life during the test execution which are described below:

Execution states of Vuser:
- Down: The first state when the Vuser is inactive.
- Pending: The second state is the pending state when the Vuser is ready to be initialized and is waiting for an available load generator, or is transferring files to the load generator. The Vuser will run when the conditions set in its scheduling attributes are met.
- Initializing: The Vuser is being initialized on the remote machine.
- Ready: The Vuser already performed the init section of the script and is ready to run.
- Running: The Vuser is active and running. The Vuser script is being executed on a load generator.
- Rendezvous: The Vuser has arrived at the rendezvous point and is waiting to be released by the Controller. This happens when all the active Vusers come under the Rendezvous state. If you do not use ‘Rendezvous Point‘ in the script then this state will be skipped.
- Passed: The Vuser has finished the run and is about to exit. This state shows that the Vuser has passed all the steps or transactions of the script.
- Failed: The Vuser has finished the run but due to an error the script failed.
- Error: A problem occurred with the Vuser. To check the complete explanation of the error you need to go to the Status field on the Vuser dialogue box or the output window.
- Gradual Exiting: The Vuser completes the iteration or action before exiting.
- Exiting: The Vuser has finished the run or has been stopped, and is now exiting.
- Stopped: The Vuser stopped when the Stop command was invoked.
Before or during the test, you can control the Vusers using the ‘Run tab’ which includes the following options:
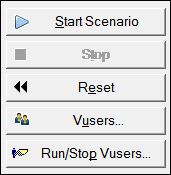
- Start Scenario: To start the test
- Stop: To stop the Vuser and end the test
- Reset: To reset the Vusers. It instructs the Vusers to go into the “Down” state.
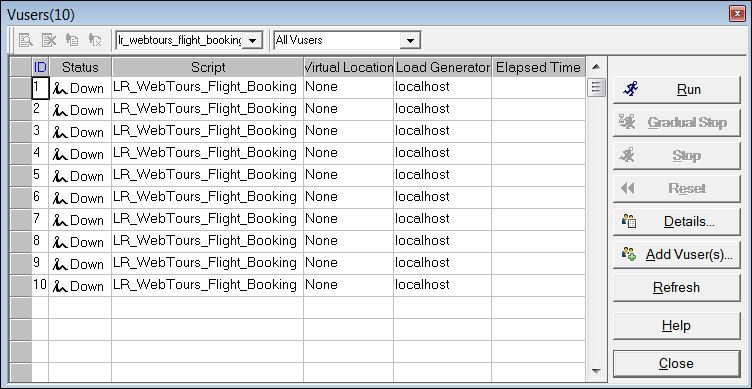
- Vusers: It opens the Vusers dialog box, where you can view the status of each of the Vusers in a Vuser group.
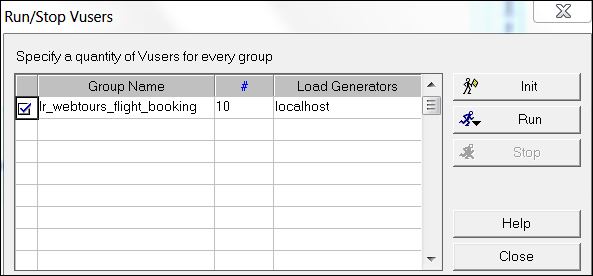
- Run/Stop Vusers: Using this button Run/Stop Vusers dialog box opens and you can add additional Vusers. Also, there are options to make Vuser’s state Initialize, Run or Stop.
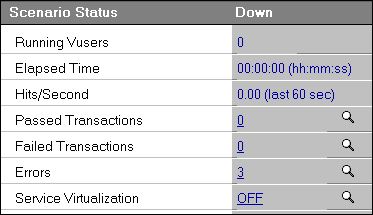
During Test Execution:
Once the test is started, you can view the status of the scenario/test in the ‘Scenario Status’ pane:
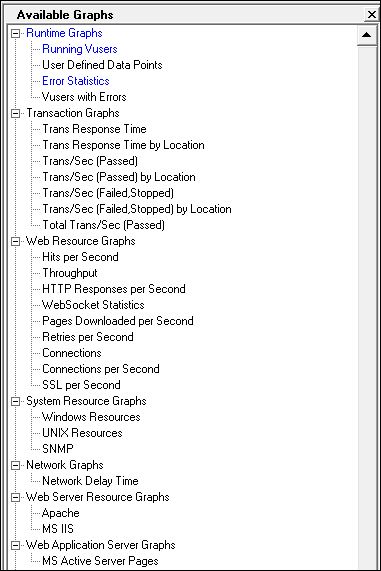
Monitoring:
The list of available graphs is given below. You can either double-click or drag and drop the required graph into the graph section. Using these graphs, you can do live monitoring of the performance of the system/application:
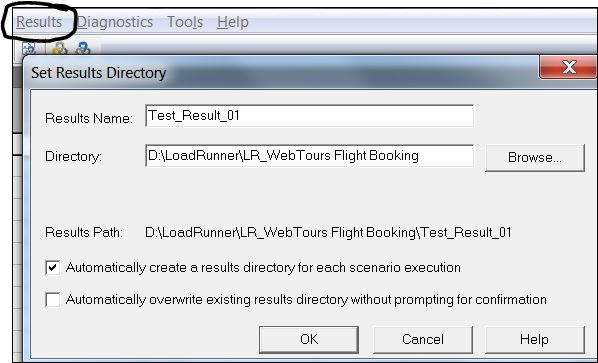
After completion of the test, results are stored in the folder that you have defined in the ‘Set Results Directory’.
Results -> Result Settings -> Set Results Directory