
LoadRunner Goal-Oriented scenario is used to achieve a defined performance testing goal. In such a scenario, you have to specify the target, minimum and maximum no. of Vusers and duration. When the execution of the script starts LoadRunner ramp-up the load from min no. of Vusers to max no. of Vusers and in parallel checks whether the goal or target is reached or not. If the target does not reach, it stops the execution of the test. The target can be mentioned in terms of response time, no. of Vusers, transactions per sec, throughput etc. To prepare the goal-oriented scenario for your load test you need to follow the below steps in the controller:
Steps for a goal-oriented scenario in LoadRunner
1. Open “Controller”
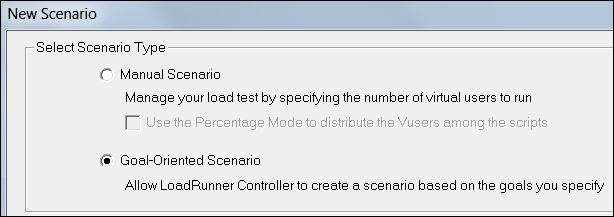
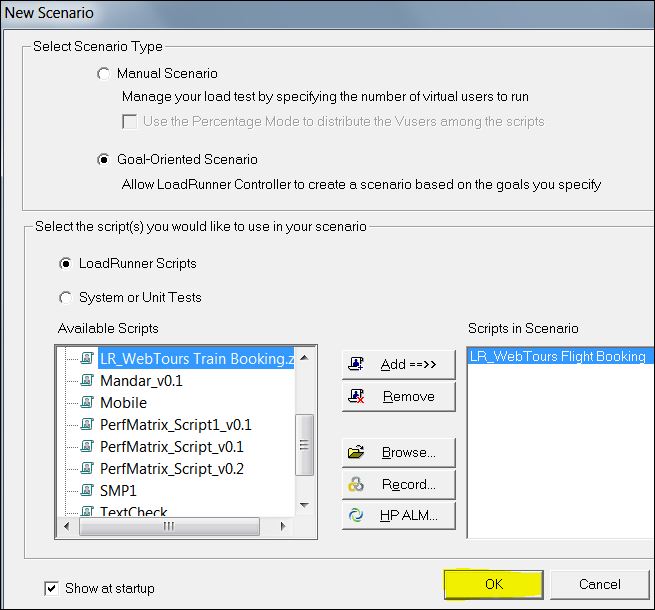
2. After launching the controller, you will get a ‘New Scenario’ pop-up. Choose ‘Goal-Oriented Scenario’ option.
3. You need to choose and add VuGen script(s) using ‘Add==>>’ button
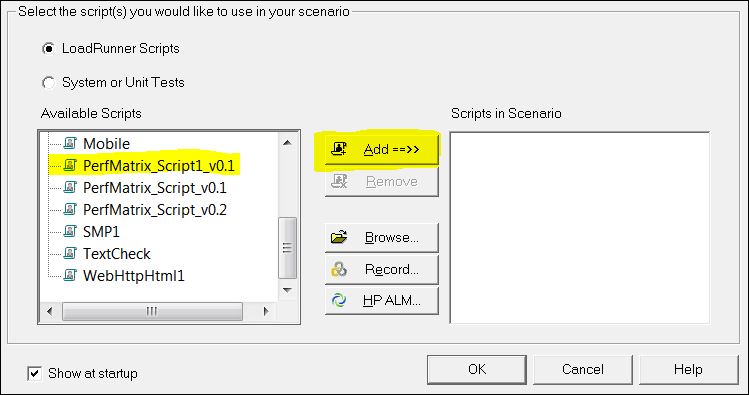
4. After adding the script, click ‘OK’.
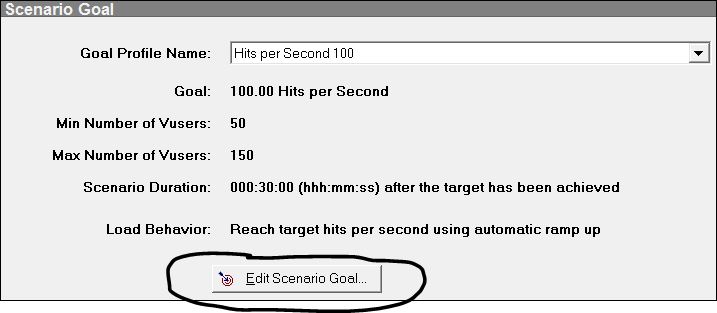
5. By default ‘Hits per Second 100’ goal scenario opens. If you want to change the goal then click ‘Edit Scenario Goal’.
6. ‘Edit Scenario Goal’ window will appear. You can choose Goal type in ‘Define Scenario Goal’ section. There are 5 types of performance goal in the dropdown. You can choose any of them.

Goal Types:
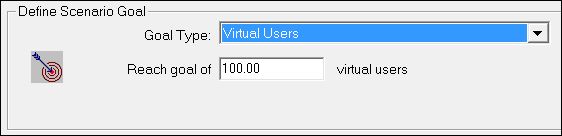
a. Virtual Users: This goal tests if your application can run a specified number of Vusers simultaneously. Running this type of goal-oriented scenario is similar to running a manual scenario.
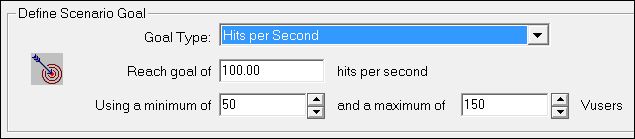
b. Hits per Second: This goal is used to test the strength of the server in terms of hits. For this type of goal, you need to specify a minimum-maximum range of Vusers for the scenario to run and the hits per second goal that you want to achieve. The hits per second goal are for Web Vusers only and relate to HTTP requests per second.
c. Transactions per Second: This goal is used to test the strength of the server in terms of TPS or transactions per second. For this type of goal, you need to specify a minimum-maximum range of Vusers for the scenario to run and transactions per second goal of a transaction which you can choose from the ‘Transaction Name’ dropdown.

d. Transaction Response Time: This goal is used to achieve the response time goal of a transaction. For this type of goal, you need to specify a minimum-maximum range of Vusers for the scenario to run and the response time goal of a transaction which you can choose from the ‘Transaction Name’ dropdown.

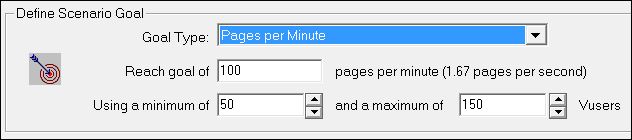
e. Pages per Minute: This goal is used to test the strength of the server in terms of pages. For this type of goal, you need to specify a minimum-maximum range of Vusers for the scenario to run and the pages per minute goal that you want to achieve. The pages per minute goal is for Web Vusers only.
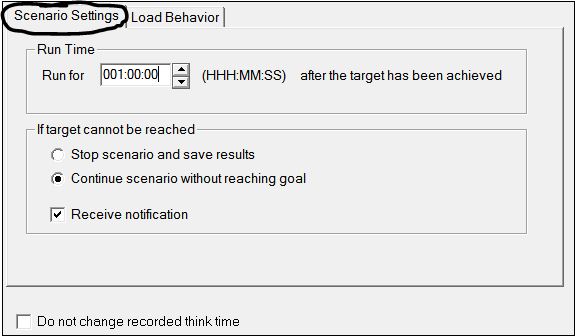
7. Update ‘Scenario Settings’ as per your requirement.
8. Set ‘Run Time’. This is the duration of the test after the target is achieved. You can also called as steady state.
9. Set the action ‘If the target cannot be reached’. Either ‘Stop scenario and save results’ or ‘Continue scenario without reaching goal’
10. You can also check the ‘Receive notification’ box to get a notification of either of the cases.
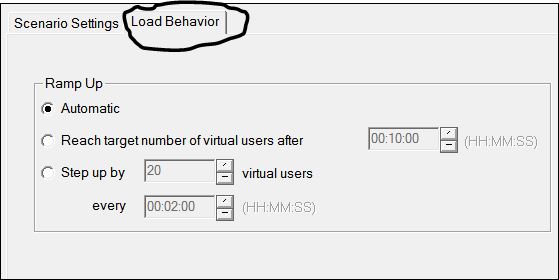
11. Set ‘Load Behavior’ as per your requirement.
12. You can choose load behaviour either ‘Automatic’ or from given options.
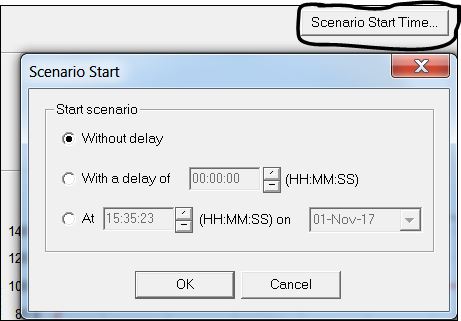
13. You can set the scenario start time using the ‘Scenario Start Time’ option. You can choose any one of them:
- Without delay
- With a delay of HH:MM:SS time
- At specific system clock time
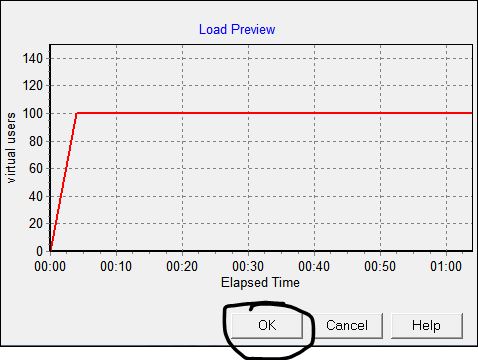
14. Once you set the performance testing goal, scenario, load behaviour and scenario start time click ‘OK’.
15. Select the load generator.
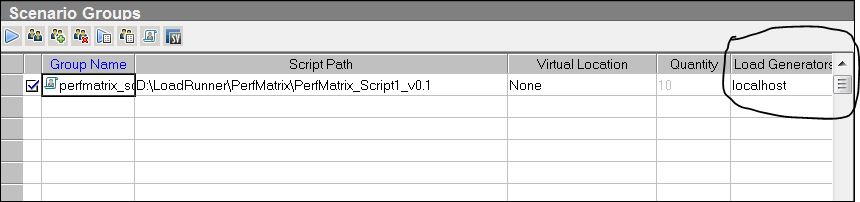
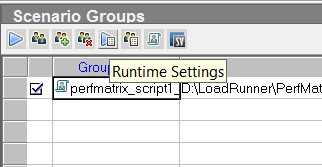
16. If you want to overwrite runtime then use the ‘Run-time setting’ option, this will overwrite the VuGen run-time setting.
That’s all. Likewise, you can create your performance test goal-oriented scenario in LoadRunner and check whether the application meets the defined goal or not. The next step will be to execute the test by clicking the ‘Start Scenario’ button under the ‘Run’ tab.