After getting the details on Loadrunner terminologies and Basic Scripting Steps, now you are ready to record your first LoadRunner script. When Mercury launched LoadRunner, they introduced an effortless and time-saving feature in LoadRunner that was the “Recording” option. Using the recording option a performance tester can simply navigate the pages of the website and the action is recorded by LoadRunner (VuGen). LoadRunner still sticks to the same concept and even enhances this feature up to a great extent for different protocols.
Before starting the script creation, it is mandatory to identify the correct protocol that supports the test application. The process of selecting the protocol has been covered in the previous topic (How to select protocol in LoadRunner?). You can also refer to the list of available LoadRunner protocols here.
So, let’s start:
Steps to record LoadRunner script:
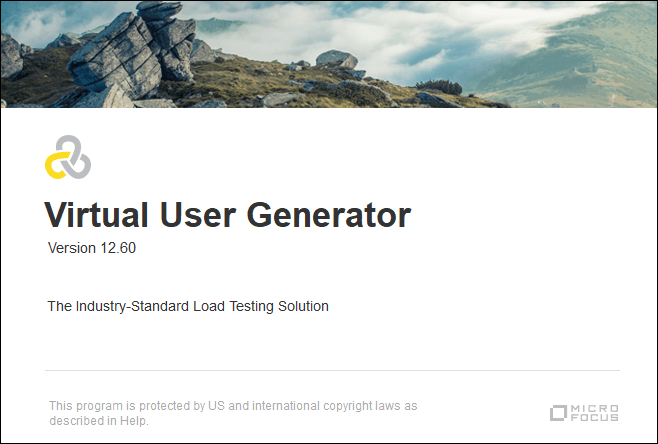
1. Open VuGen on your machine
2. Go to the menu bar and click ‘File’ and select ‘New Script and Solution’
OR
Press ‘Ctrl+N’.

3. A dialogue box named ‘Create a New Script’ will open.
4. Select ‘Single Protocol’ or ‘Multiple Protocols’ from the Category list shown in the left (Figure 03). If you are recording a mobile or IoT application then choose the respective option. The ‘Popular’ category shows the known and frequently used protocol list whereas the ‘Recent’ category shows the list of protocols that you used recently. If you are using VuGen first time then the ‘Recent’ category will be blank.

5. Select the proper protocol(s) from the Protocol list and provide the suitable name of the script in the ‘Script Name’ field. You can see the default location of the script which is auto-populated in the ‘Location’ field. In case you want to change the location then browse the location and select the folder. In addition, you can also provide a solution name and location of the solution but these details are optional.
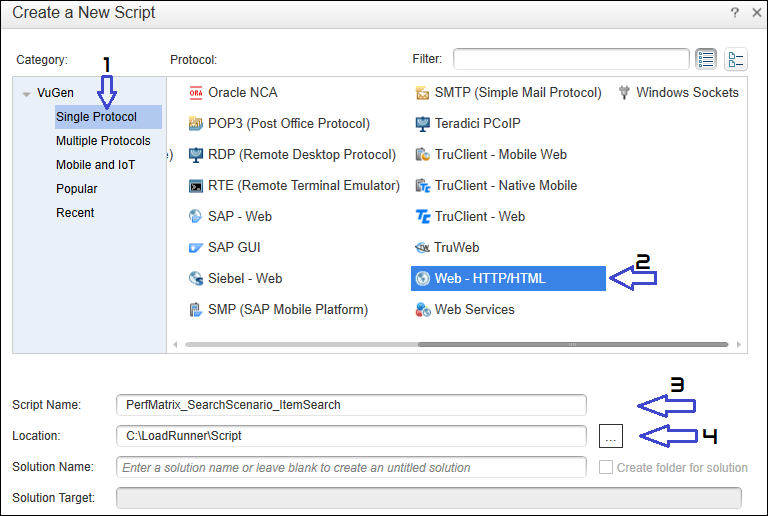
Note: You can not give init, run or end as a name of the script because these names are used internally by VuGen.
6. Click the ‘Create’ button to start the script. VuGen shows the ‘Loading Solution’ pop-up and takes some time to show the ‘Solution Explorer’ dashboard.

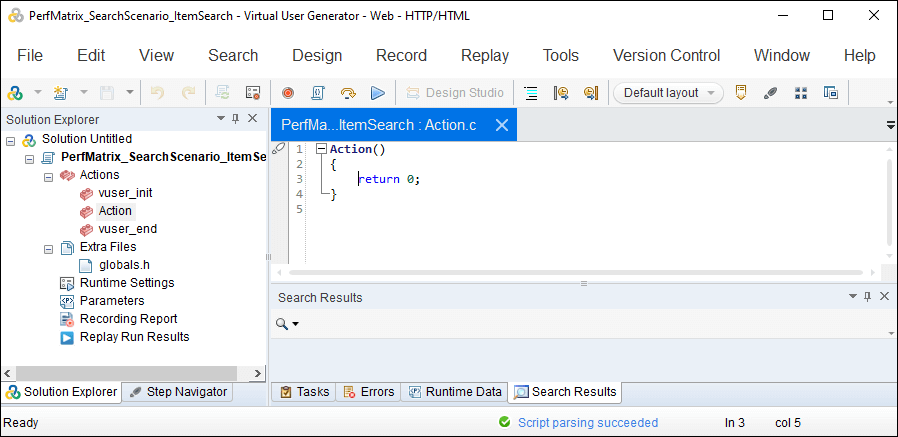
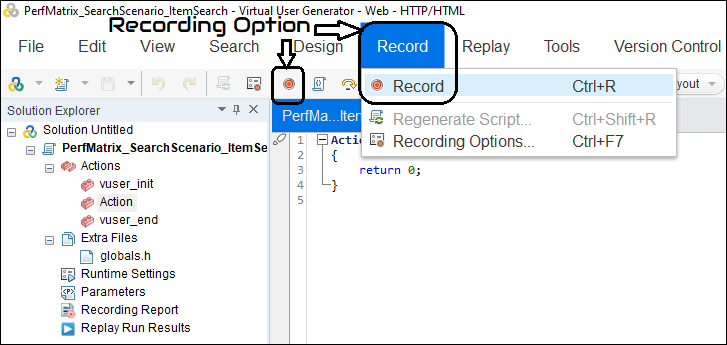
7. The next step is to start the recording. Here you have 3 options.
- Press ‘Ctrl+R’
OR - In the main menu of VuGen, Go to Record -> Record
OR - In the quick taskbar, you can see a red button when you hover the cursor, and then it displays the message ‘Record (Ctrl+R)’
You can choose either of the options to launch the recording window.
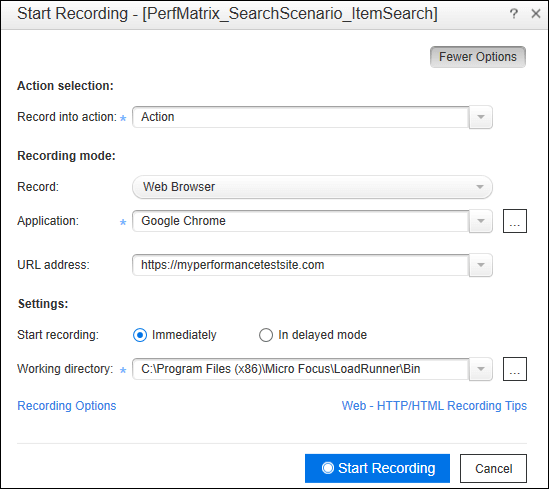
8. The ‘Start Recording’ window will appear.
- Action Selection: List out vuser_init, Action, vuser_end or any custom action that you have added before starting the script recording. The default option is ‘Action’.
- Recording mode:
- Record: It depends on the type of application. If you have a Windows-based standalone application then choose the ‘Windows Application’ option.
- Application: Select the application type or browser based on the type of application. This option is not applicable for ‘Remote application via LoadRunner Proxy’ and ‘Captured Traffic File Analysis’.
- URL Address: Enter the URL of the application. Only applicable to the Web Browser option.
- Settings:
- Start recording: It provides an option for the delay in recording.
- Working directory: The location of the LoadRunner directory used during the recording.
- ‘Recording Options’ shows the advanced setting which you can change according to your application type/requirement.
9. Click the ‘Start Recording’ button.
10. The VuGen floating toolbar appears with the below options (shown in Figure 09). You can start, stop, pause, and cancel the recording, select the action, provide the transaction name, insert rendezvous point, comment and text check during the recording using the VuGen floating toolbar.

11. VuGen launches the selected browser/application for the recording. If the selected browser is already open then it will ask to close the session so that a new session with the given URL can be launched.
12. Perform the business processes (User actions) on your application which VuGen will record in the backend. You can see the ‘Recording events’ increases as you progress through the navigation.
13. You can add a comment, text check, rendezvous point and new transactions like Login, Search etc. during the recording. These actions can be modified even after the generation of the script in the script enhancement phase.
14. Click the ‘Stop’ button (shown in Figure 09) on the floating toolbar on the completion of the recording. When you click the ‘Stop’ button (in Square Shape) VuGen starts the code generation process and you can see the ‘Code Generation’ pop-up with a progress bar.

15. On the completion of script generation, VuGen shows the ‘Recording Report’.
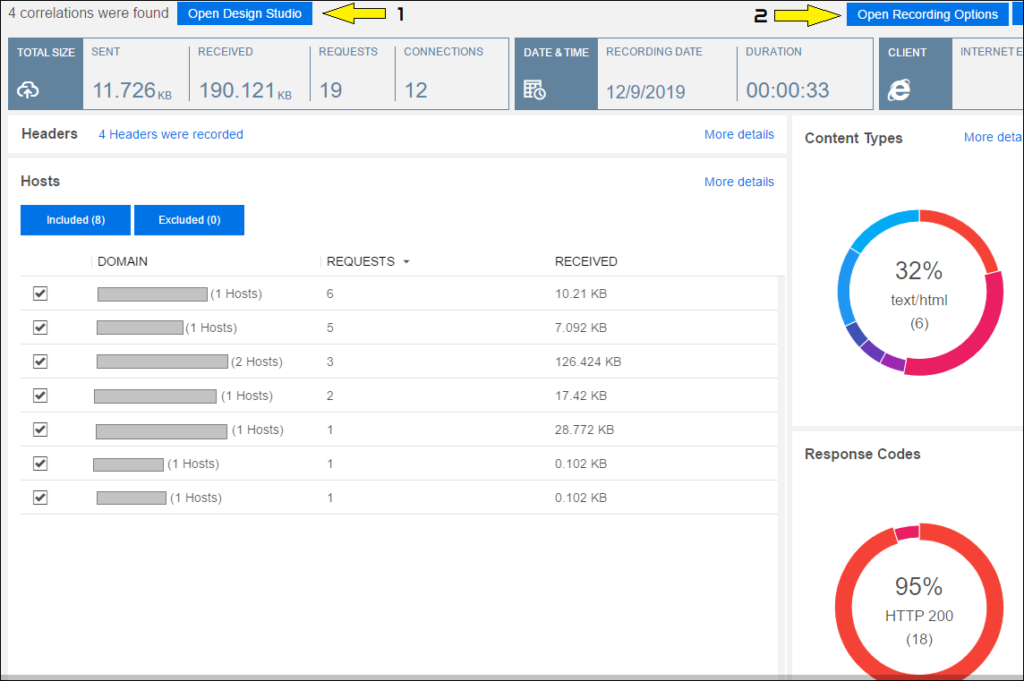
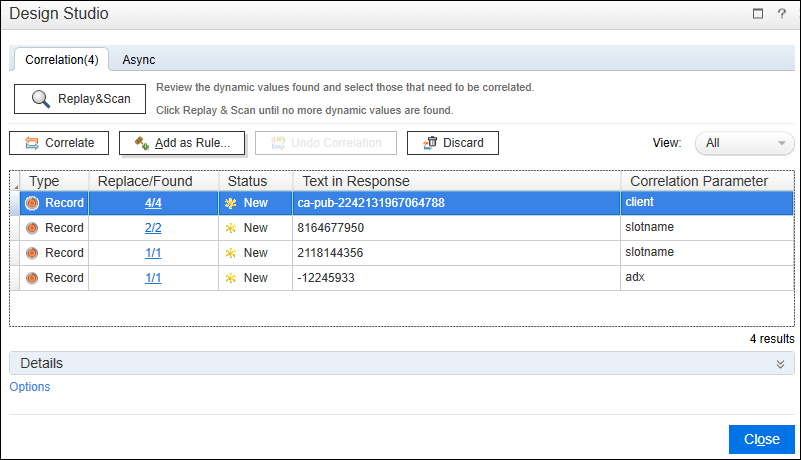
16. ‘Design Studio’ window may come to correlate dynamic values. If not then you can click ‘Open Design Studio’ button in recording report (shown in Figure 11). This option provides an auto-correlation feature.
You can select the row and click ‘Correlate’ to perform auto-correlation. VuGen adds a correlation function and replaces the dynamic value(s) with a correlation parameter in the script. You also have options to add the correlation as a rule or discard it. Close the window once you have done with auto-correlation.
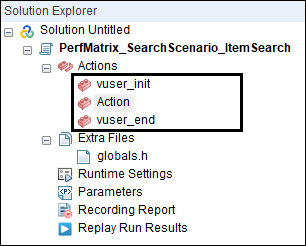
17. The recorded script can be found under the ‘Actions’ tab of ‘Solution Explorer’. Click the respective action to refer to the portion of the script.
This post showed you how quickly and in the easiest way you can record the script for Performance Testing using LoadRunner. But this is not the final script that you can run in the controller or PC (Performance Center) and perform the testing. As explained in the ‘LoadRunner Scripting Basics‘ post, the script recording is one of the steps followed by script debugging and enhancement. Hence before starting the test execution, you need to debug the script. Refer to the later posts for detailed understanding.
You may be interested:
