Watch YouTube Video: JMeter Script Recording & Best Practices
Apache JMeter is a Java-based tool which records the communication between the client i.e. end-user and server and converts this communication into a test script. This test script is used to generate the load on the server. To record the communication through JMeter and convert it into a script, you must have below listed 5 pre-requisites:
- Application or Website Link
- Test Data like user credentials
- Transaction Flow Diagram / Navigation Flow / Use Case
- Web browser (by default you have) like Chrome, Firefox etc.
- Apache JMeter (How to install?)
JMeter Script Recording Steps:
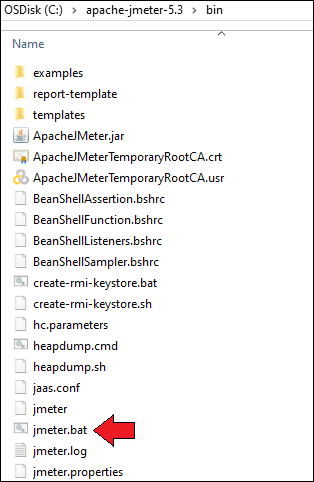
1. Launch JMeter by navigating to <JMETER_HOME>/bin (Example: C:\apache-jmeter-5.3\bin)
2. Click jmeter.bat (Windows) or Enter the command ‘jmeter’ (Linux/Unix). Read the article to know more about different Launching modes of JMeter
3. Select ‘Test Plan’ on the tree
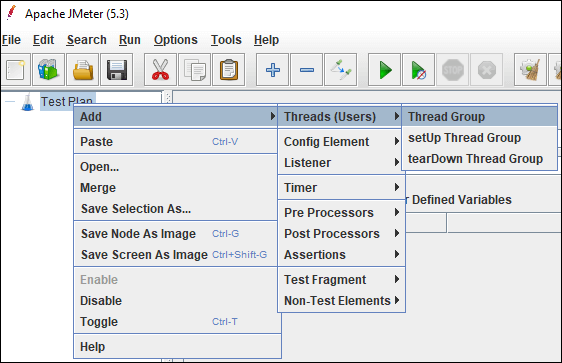
4. Right-click on the ‘Test Plan’ and add a ‘Thread Group’
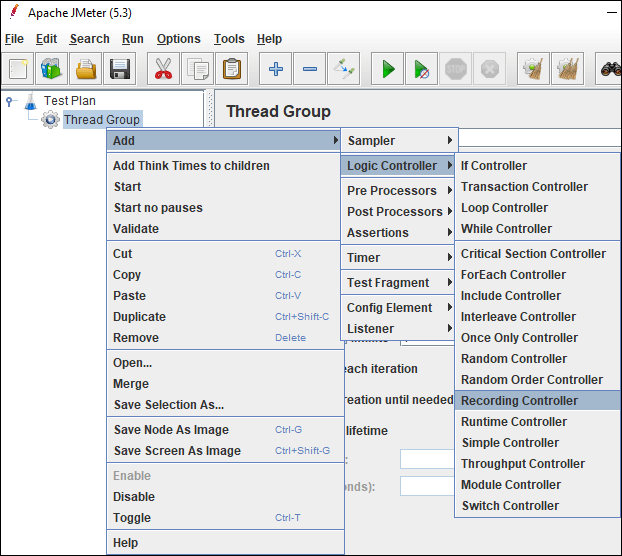
5. Select ‘Thread Group’ and right-click to add ‘Recording Controller’.
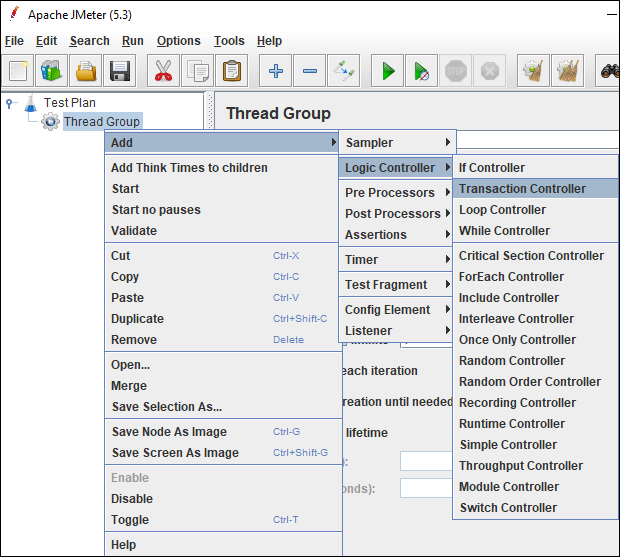
Note: You can also use ‘Transaction Controller’ instead of ‘Recording Controller’.
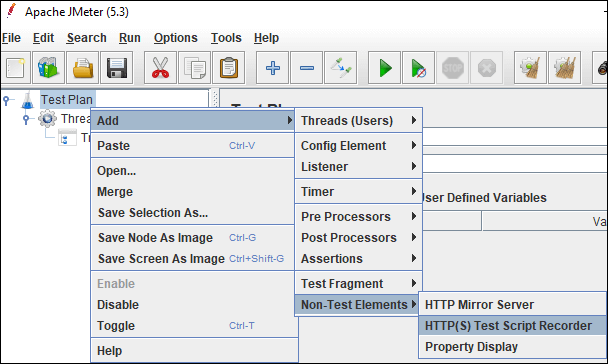
6. Right-click on the ‘Test Plan’ and add ‘HTTP(S) Test Script Recorder’ which is a ‘Non-test Element’.
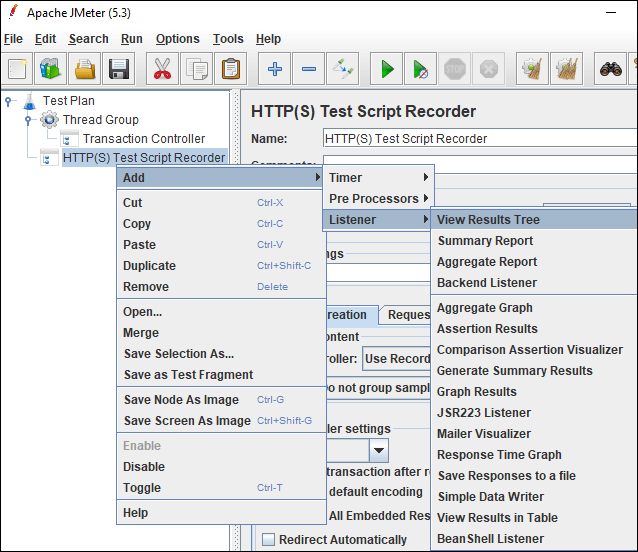
7. Under ‘HTTP(S) Test Script Recorder’, add ‘View Results Tree’ listener by right-clicking on the ‘HTTP(S) Test Script Recorder’ element and providing a .jtl file path in the Filename. This .jtl file is required to save the recording logs.
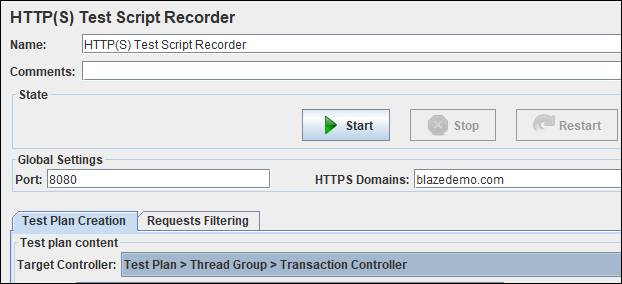
8. In ‘HTTP(S) Test Script Recorder’, under the ‘Global Settings’ section, provide the port number as ‘8080’ and the application URL in the ‘HTTPS Domain’ text field. While providing the application URL do not use http, https, : and /.

9. In ‘HTTP(S) Test Script Recorder’, under the ‘Test Plan Creation’ tab, the default value of the ‘Target Controller’ is ‘Use Recording Controller’ In case you use ‘Transaction Controller’ as shown in step 5 then select the particular transaction controller as target controller.
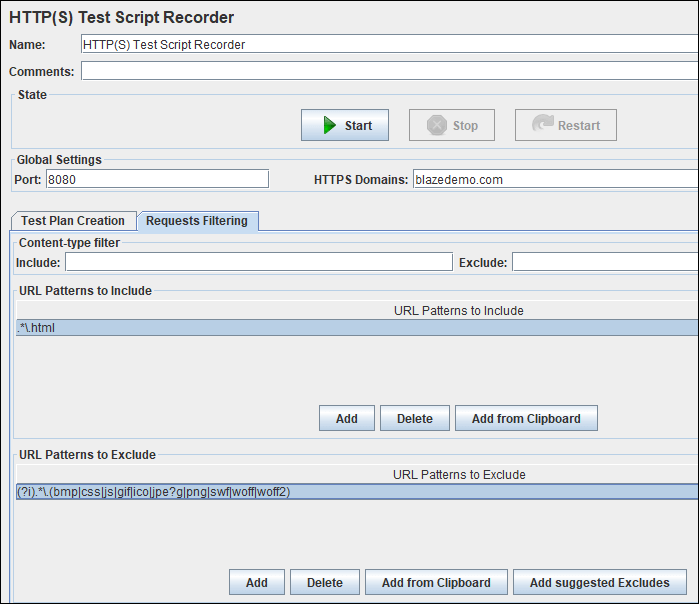
10. Optional Step: On HTTP(S) Test Script Recorder, under the ‘Request Filtering’ tab, click the ‘Add’ button in ‘URL Patterns to Include’. This will create a blank entry; write ‘.*\.html’.
Also, click the ‘Add suggested Excludes’ button in the ‘URL Patterns to Exclude’ section, this will add a new row i.e. (?i).*.(bmp|css|js|gif|ico|jpe?g|png|swf|woff|woff2). After excluding such a request pattern, JMeter does not record those requests which have excluded keywords. You can also add new custom patterns or keywords to this list.
11. Now, Launch Browser (Chrome/Firefox/Edge) and set Manual Proxy.
Address: localhost or IP address of your system
Port: 8080
Refer respective screenshot:
Firefox:
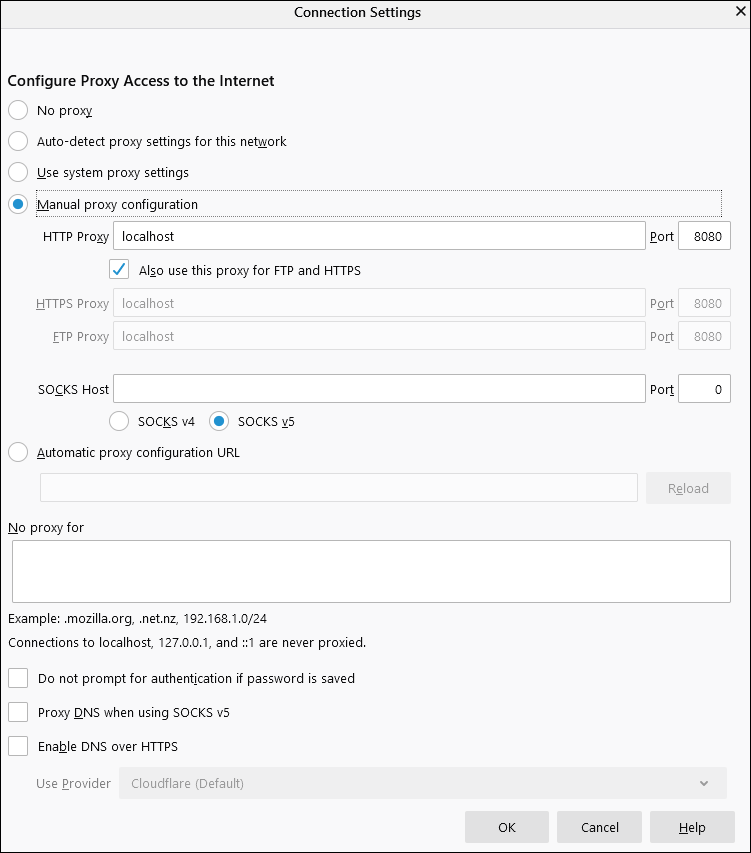
Chrome:
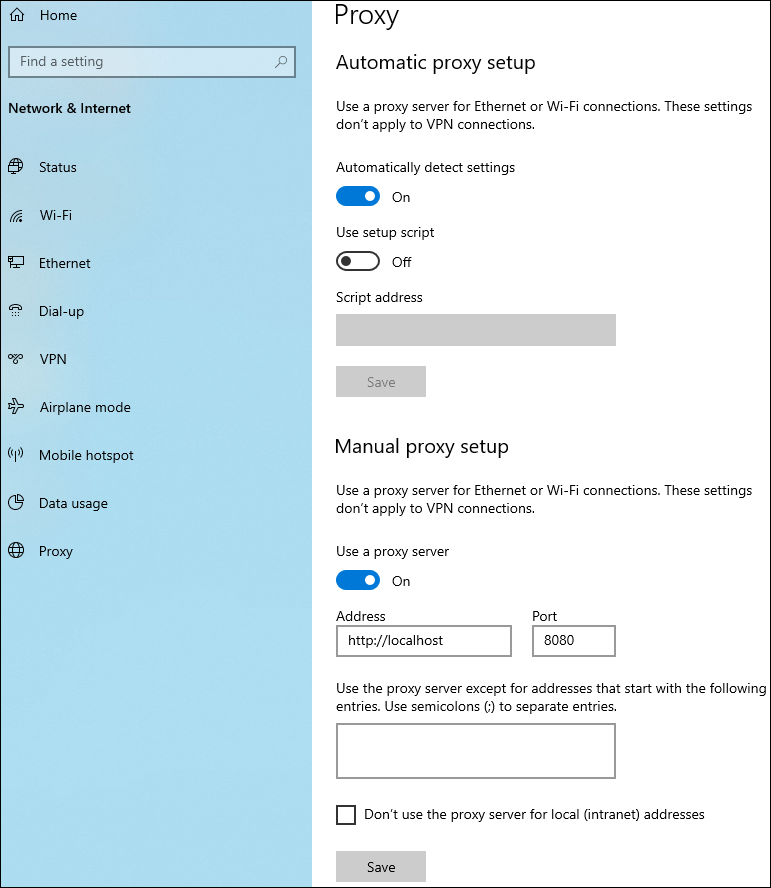
12. In case the application is secured (https) then you need to add a ‘JMeter Root CA certificate’ to the browser. More details are given in ‘How to record JMeter script for a secured (https) application?‘.
13. Go back to JMeter, in ‘HTTP(S) Test Script Recorder’ and click the ‘Start’ button.

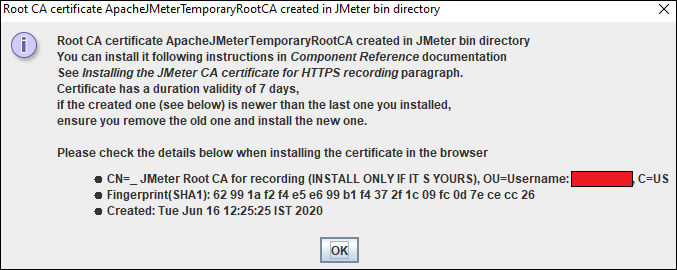
14. A ‘Root CA Certificate’ pop-up will open. Click ‘OK’.
15. Go to your browser and type the application URL and follow the transaction flow. You can see a floating ‘Recording Bar’ while recording the flow.
16. Once navigation is completed, click the ‘Stop’ button on Recording Bar or in ‘HTTP(S) Test Script Recorder’.

You may be interested:


This is insane. I just want to record a script! Should be one step: hit record button.