
In NeoLoad, after recording the user step, conducting a check user path and correlating the dynamic value, the next step is ‘Parameterization’ i.e. defining a variable for varying user inputs.
For Beginners: If you are a beginner then you must know what is parameterization? Parameterization is a method to replace the hardcoded value like application URL, User Name, Password etc. with a parameter that has different input values.
Example: You recorded a login page of an application by providing the credentials USER1 and PASS1. When you replay the script, the same credentials are passed. Now, if you want to run a test with 5 different users (USER2, USER3, USER4, USER5 and USER6) then you need to replace the hardcoded value i.e. USER1 with a parameter (say userName). This parameter will have a list of all the values related to the User Name and pass them at the time of the test execution.
Hence a parameter is used to pass different input values in the script.
How to do parameterization in NeoLoad?
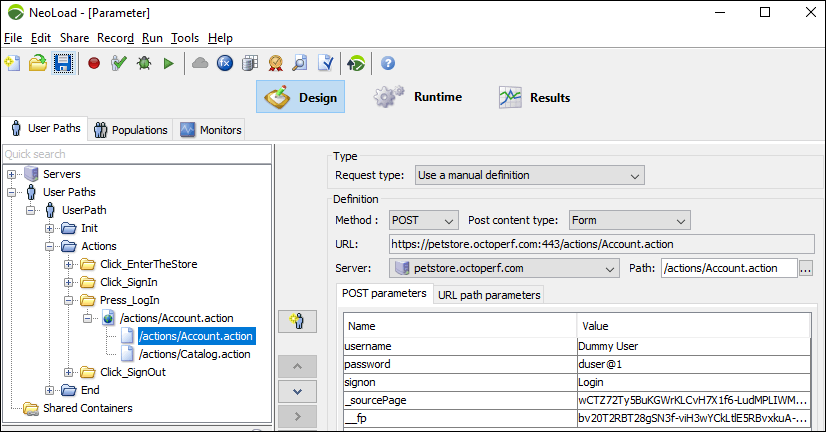
To make the parametrization concept easy, a login-logout flow is recorded through the NeoLoad tool. The script has 4 transactions along with the Login page. In the Login page, the ‘username’ and ‘password’ parameter values are passed with the request. Refer to the below figure:
Now, the aim is to parameterize the value passing as ‘username’ and ‘password’ so that virtual users can log in through different credentials. For that purpose, you need to follow the below steps:
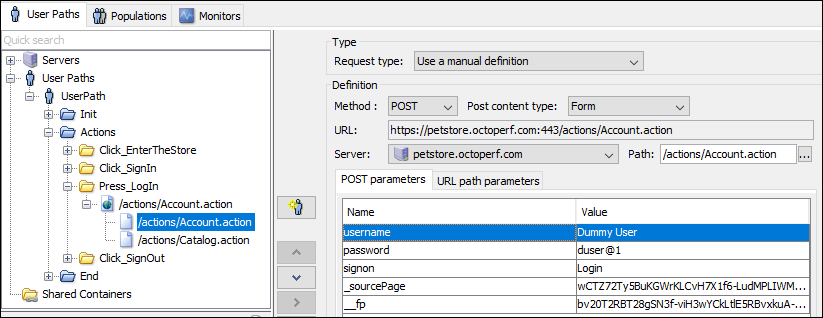
- Select the row under the parameter tab. This tab could be ‘Post parameters’ or ‘Request parameters’ in the script.
- Double-click on the selected row
- ‘Request parameter’ pop-up appears
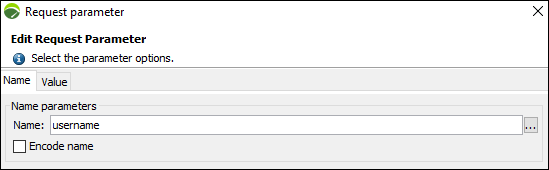
- Go to the ‘Value’ tab
- Here, you can see two options:
- Use an expression: This option is mainly used for parameterization in which input values are passed from a pre-defined list or external source.
- Use an extracted value: This option is used for correlation purposes.
- Select ‘Use an expression’ (Default option)

- In the ‘Expression’ field, you can see the original (recorded) value
- Click on a box with three dots (next to the ‘Expression’ field)
- ‘Variable picker’ pop-up appears
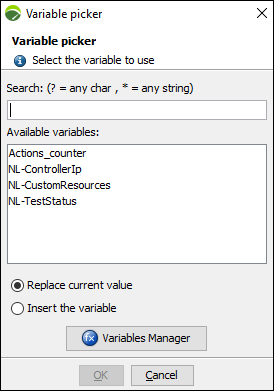
- If you already have a defined variable then choose the appropriate variable from the list else click ‘Variables Manager’.
- ‘Variables’ pop-up appears.

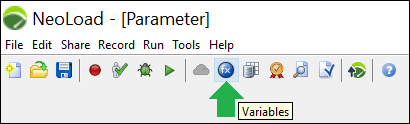
- The ‘Variables’ option is also available in the menu as shown in the below figure.
- Click ‘New variable’
- A pop-up appears with a list of variable types.

- Since username and password are interdependent variables they need to be passed in a pair. Therefore ‘List’ and ‘File’ are the suitable variable types. We will see both types of variables and understand how they are implemented.
Note: Use any one of the following variable types as per your requirement.
‘List’ Variable Type:
This is a simple type of variable in which you can simply give the name of the variable, and column name and provide the list of values. For the interdependent variables, you can add the columns by using the ‘Add Column’ button and defining the name of the column. Let’s see how.
- Select ‘List’

- Enter the name of the variable say userCredential
- You can also provide a description of the variable. This is optional.
- Add a column using the ‘Add Column’ button
- Rename both the column as ‘userName’ and ‘passWord’
- Add the value of respective variables. Use the ‘Add Value’ button to add more rows.
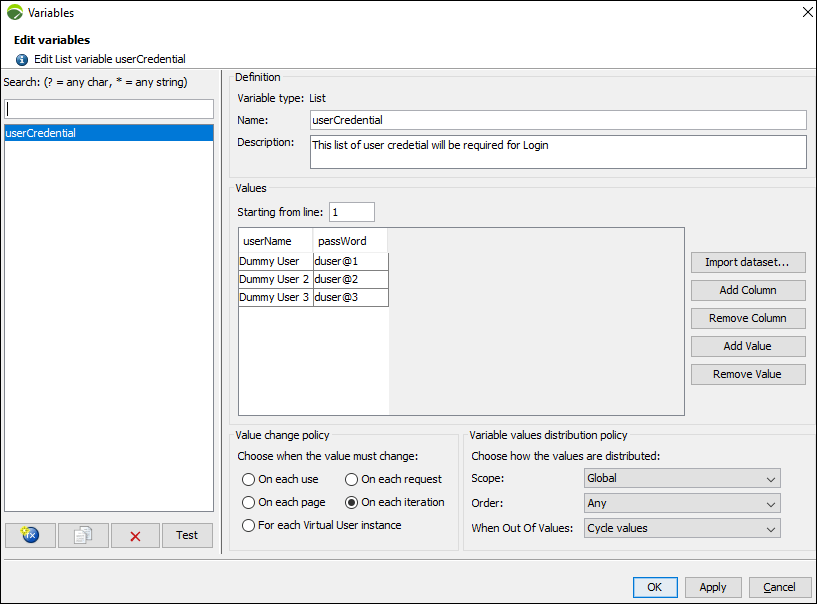
- Click ‘Apply’
- Click ‘OK’
- Select the correct variable name from the list

- Click ‘OK’

- Click ‘OK’

‘File’ Variable Type:
The core concept of the ‘File’ type variable is similar to LoadRunner. If you have any existing test data file in which credentials are available and separated by a separator like a comma, semi-colon, space, tab etc. then the ‘File’ variable type is most suitable to fulfil your requirement. To implement it:
- Select ‘File’
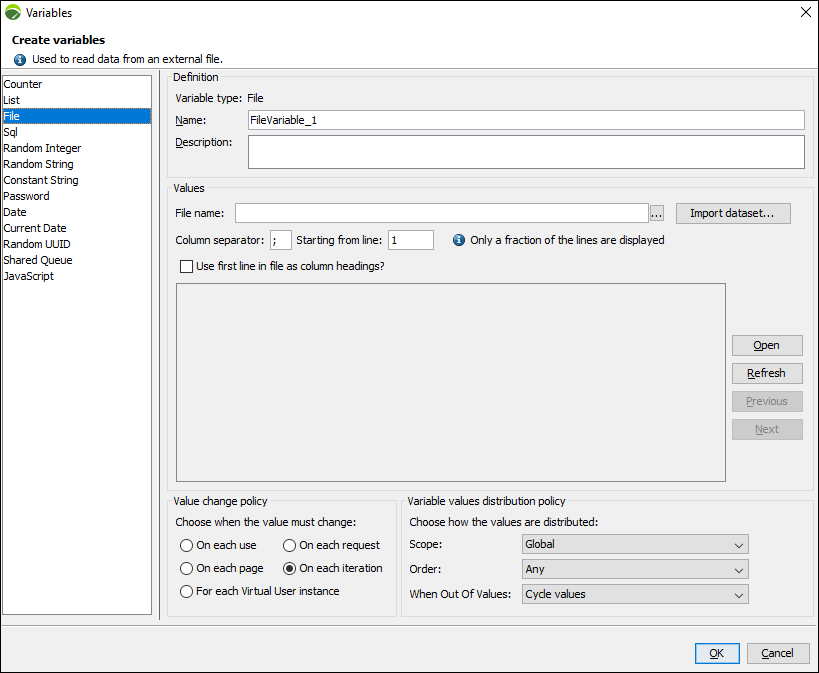
- Enter the name of the variable say userCredential
- You can also provide a description of the variable. This is optional.
- Browse the test data file by clicking the box next ‘File Name’ field.
- Use the correct separator in the ‘Column separator’. By default, it is semi-colon (;).
- Press the’ Refresh’ button to display the file data in the correct format.
- Enter the appropriate value in the ‘Starting from line’ field.
- Tick-mark ‘Use first line in file as column heading?’, in case the first row is a header of the column in the test data file.

- Click ‘Apply’
- Click ‘OK’
- Select the correct variable name from the list

- Click ‘OK’
- Click ‘OK’
- Now, the parameterization of the ‘password’ value will be easy because you have already defined the variable. The parameterization of ‘password’ is the same case when you create a variable using the ‘Variables’ (from the menu) option and replace the value with that parameter. Let’s see in the further steps.
- Select the ‘password’ row
- Double-click on the selected row
- ‘Request parameter’ pop-up appears
- Go to the ‘Value’ tab
- Select ‘Use an expression’ (Default option)
- In the ‘Expression’ field, you can see the original (recorded) value
- Click on a box with three dots (next to the ‘Expression’ field)
- ‘Variable picker’ pop-up appears
- Select the appropriate variable i.e. userCredential.passWord

- Click ‘OK’

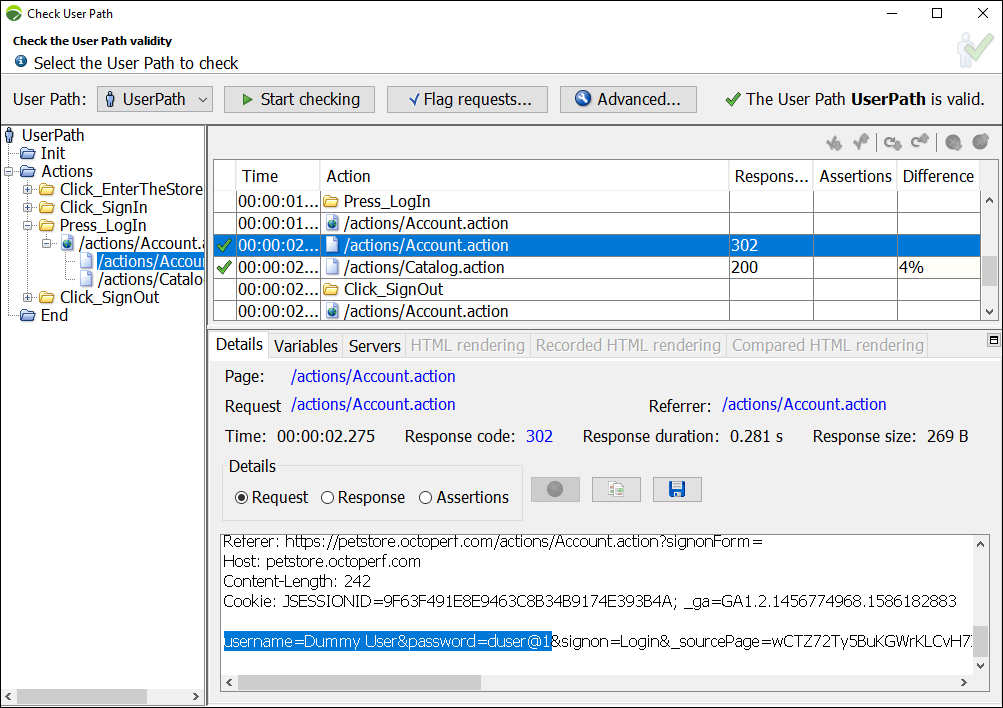
- Execute the ‘Check User Path’ and verify the value passing through the variables. Either you can verify the variable input in the respective request (Figure 21) or under the ‘Variables’ tab (Figure 22).

You may be interested: