NeoLoad is a well-known performance testing tool. In the previous article, you got to know about the functional and optional features of this tool. This article describes the step-by-step guide for the test script recording through the NeoLoad Tool.
Steps for test script recording through NeoLoad
- Launch NeoLoad GUI
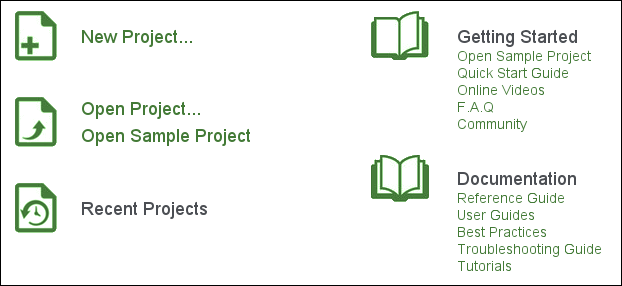
- Create a new project, by clicking the ‘New Project’ link.
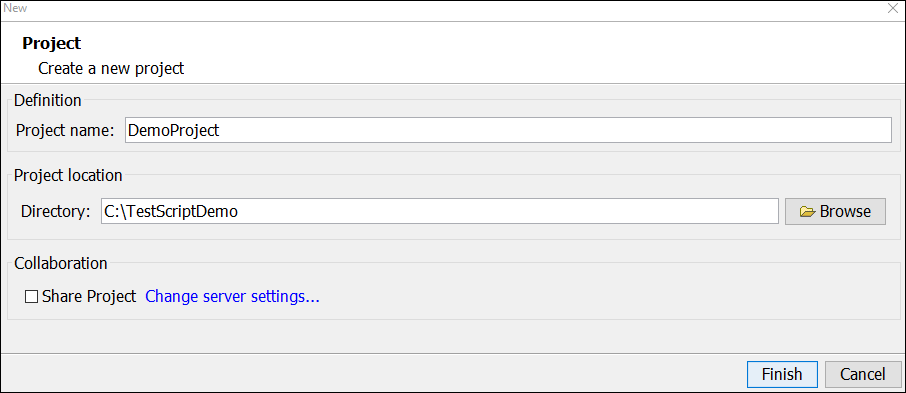
- Enter the project name and browse the directory where you want to save the test script. You can also keep the default directory path suggested by NeoLoad. If you work in a shared mode with your team then use the ‘Share Project’ option under the ‘Collaboration’ section. Click ‘Finish’.
- A ‘Saving project…’ pop-up will appear.
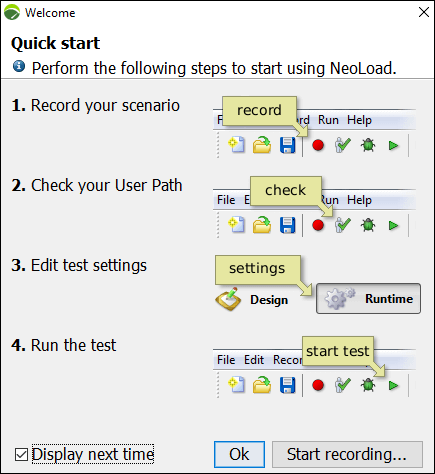
- If you are launching the first project then the ‘Quick Start’ window will appear to guide you.
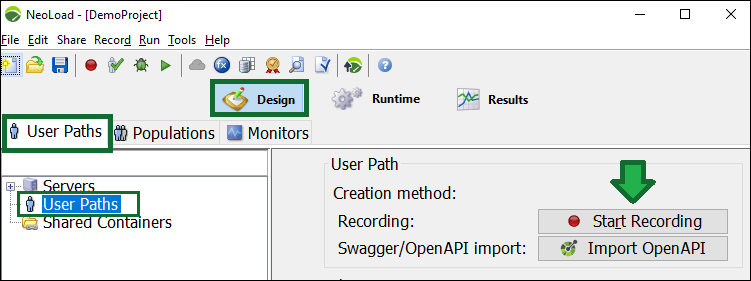
- Select ‘Design’ Component -> ‘User Paths’ Tab -> ‘User Paths’ Element -> Click ‘Start Recording’ to record the workflow.
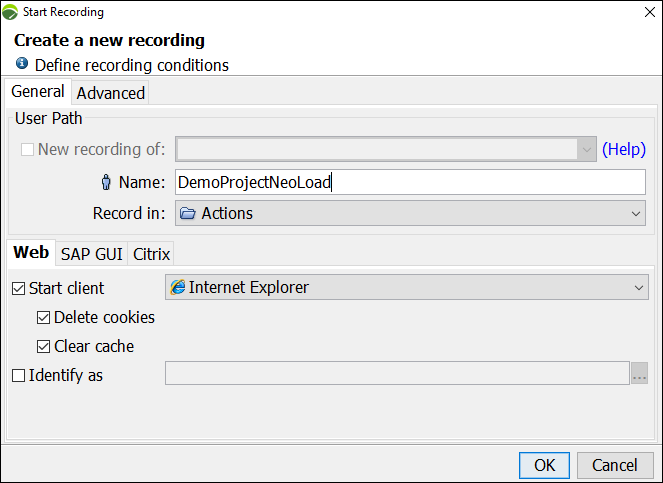
- The ‘Start Recording’ dialogue box opens. Under the ‘General’ tab
- User Path
- Add the desired name of the workflow in the Name field.
- In ‘Record in’, select the container (Init / Actions) in which the User Actions will be recorded.
- Web
- Select the desired client (browser) to record the workflow. The list shows all the available browsers in your system.
- To simulate the real browser, you have the following options. Set these options as per your requirements:
- Delete cookies
- Clear cache
- Identify as – To set the version of the browser.
- SAP GUI
- Enable or disable SAP recording
- Citrix
- Enable or disable Citrix recording
- Set the given options as per the requirement
- User Path
- Click ‘OK’
- The recording bar will appear with the following options.
- Start Recording (Default)
- Pause the recording
- Stop the recording
- Record in (Select the container)
- Transaction – Add the name of the transaction or fetch from the previous user paths or script.
- Rendezvous Point
- Help

- After recording the user’s actions, click ‘Stop the recording’ button (Square Button).
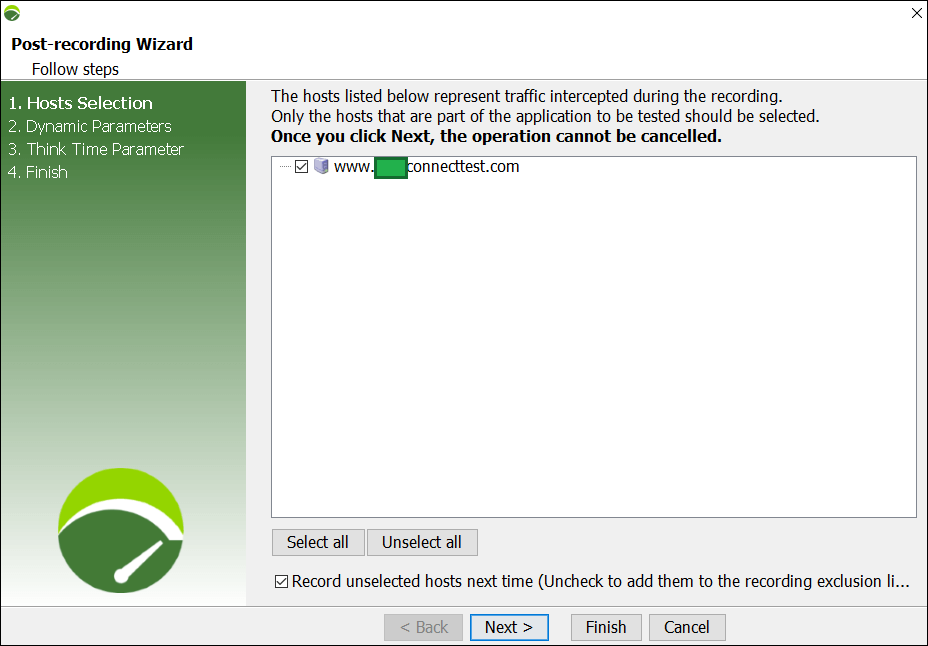
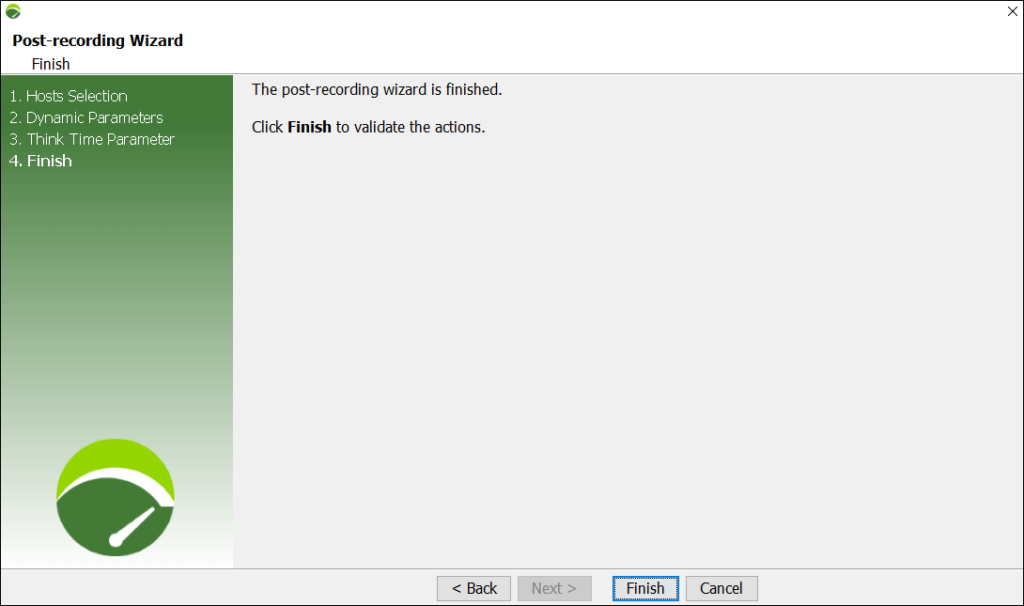
- ‘Post-recording Wizard’ window will open.
- Host Selection
- Select only the required hosts (AUT) and click ‘Next>’
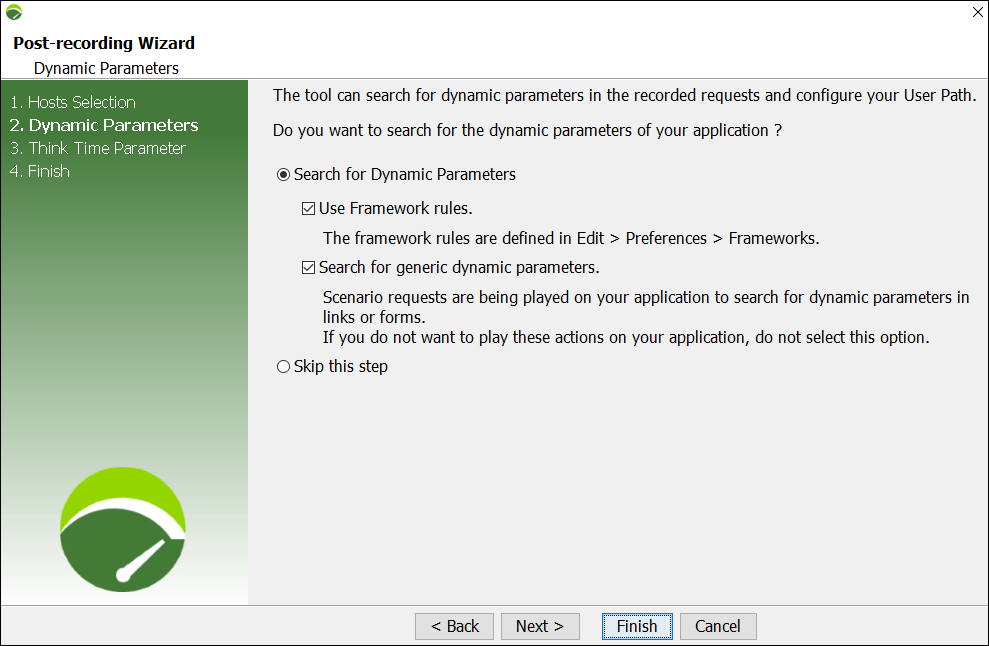
- Dynamic Parameters
- ‘Search for Dynamic Parameters’ is the feature of auto-correlation in NeoLoad. This will search and auto-correlate possible patterns from the Framework Rules by conducting a generic dynamic parameters search.
- If it is a fresh record then it is recommended to skip the autocorrelation step by selecting the ‘Skip this step’ option.
- Click ‘Next>’
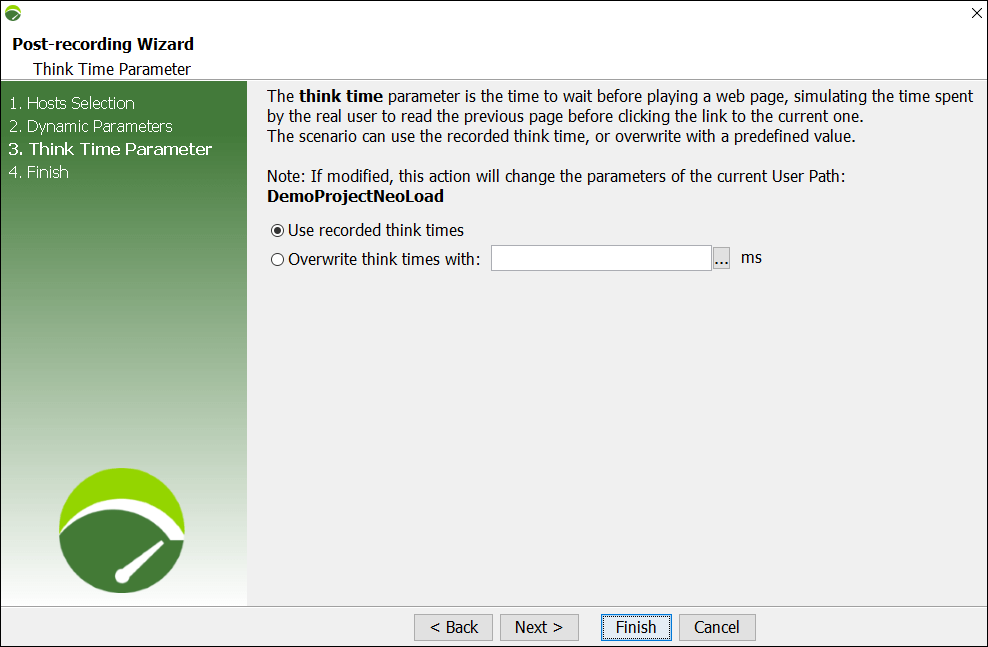
- Think Time Parameter
- Use recorded think times: To set the think time as they are recorded. You can also change the think time later.
- Overwrite think times with … ms: To change the recorded think time as per the requirement.
- Click ‘Next>’
- Click ‘Finish’
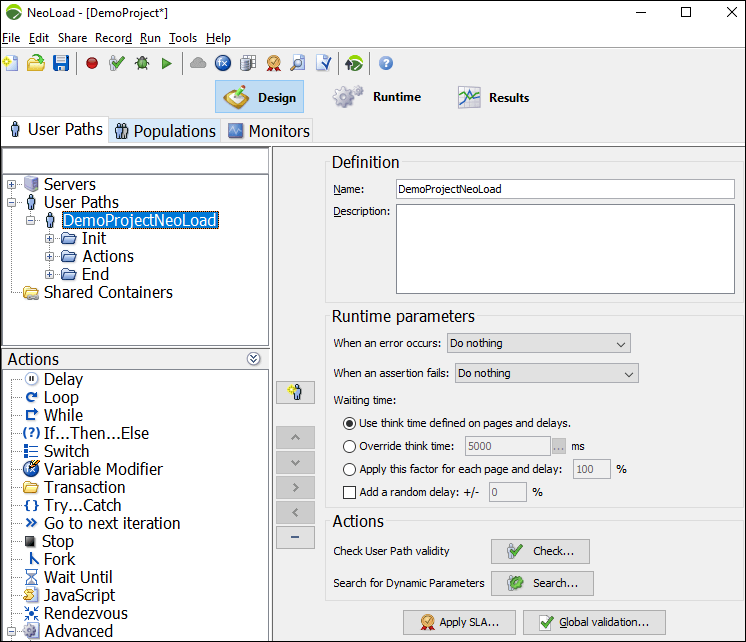
- Now, you can see the recorded performance test script with Init, Actions and End containers.
You may be interested:
- Performance Testing Tutorial
- Performance Engineering Tutorial
- Micro Focus LoadRunner Tutorial
- Apache JMeter Tutorial
