
While preparing the controller scenario, the main part is the selection of the scheduling mode. The scheduling mode helps you to emulate the scenario as per your requirement. There are two options ‘Scheduled by’ and ‘Run Mode’ in LoadRunner scenario schedule modes which form four possible combinations of test scheduling mode. Before discussing the combination of the options, firstly we will see what are these options and how they help us to create a perfect scenario.
‘Scenario Schedule’ section options
- New Schedule: To create a new schedule.

- Delete Schedule: To delete the existing schedule.

- Save new name: To rename the schedule.

- Start Time: To set the start time of the schedule.

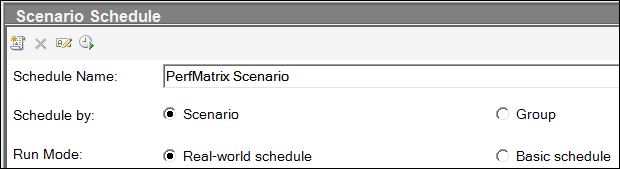
- Schedule Name: The name of the schedule.
- Schedule by: It allows the groups to run either together or separate. It has two options:
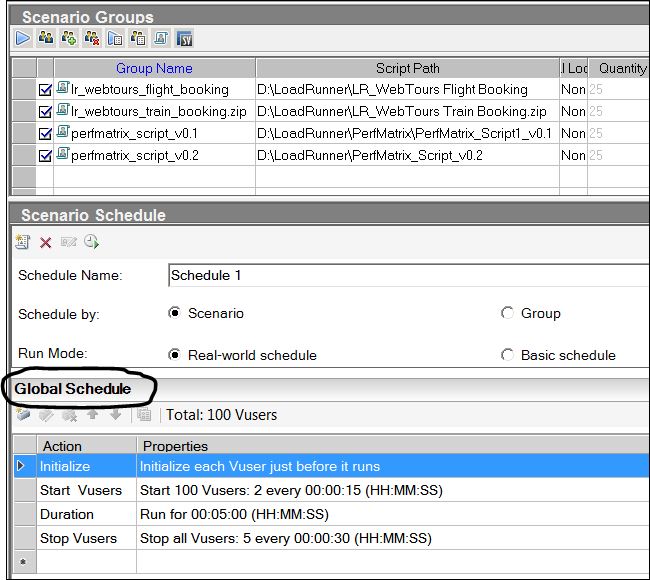
- Scenario: (One scenario setting applied to all groups) When you schedule by scenario, then the scheduler settings like Vuser initialization, test duration etc. will be applied to all the groups and the controller runs all the Vuser groups participating in the scenario simultaneously. That is, the schedule defined for running the scenario is applied to all the Vuser groups. If you pay attention to the scheduler section then you can see the word “Global Schedule” which means applied to all Vuser groups. Refer to the below screenshot:
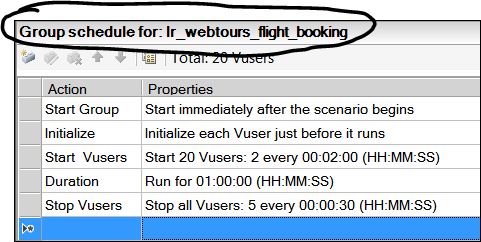
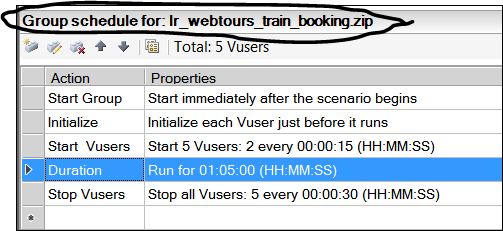
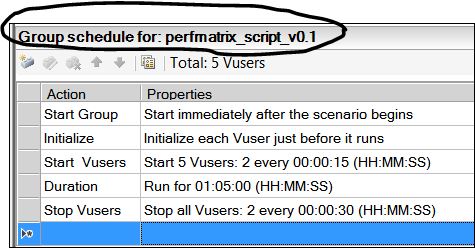
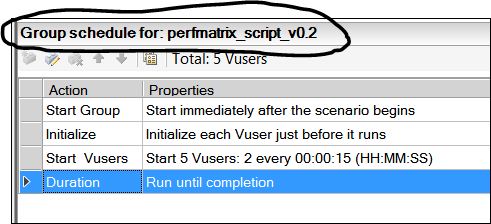
b. Group: (Each group has separate scenario setting) When you schedule by Vuser group, each Vuser group participating in the scenario runs on its own separate schedule. That is, for each Vuser group, you can specify when to start running the Vuser group, how many Vusers in the group to start and stop running within specified time intervals, and how long the group should continue running. I have 4 groups in my scenario so you can see 4 separate “Group Schedule” for each group:
Group 1:
Group 2:
Group 3:
Group 4:
- Run Mode: In run mode:
- Real-world schedule: Real-world schedule can be used to emulate a real-life scenario where you have the load varying at different points of time. Example: If you want to ramp up 100 users first with a ramp-up of 5 users/10 sec and then after 2 mins you want to ramp in 10 more users but with a ramp-up of 10 users/10 sec. This can be done by clicking on the field marked * in the scheduler. This kind of scenario can be emulated using a real-world schedule. In a real-world schedule, you can change the number of users by changing the Vusers value in the Start Vusers section of the Scheduler.
Whatever number of users you define here will be equally distributed among the scripts. You can add, delete and modify the actions in the real-world scenario which is not allowed in the basic schedule. - Basic schedule: The basic schedule is more flexible than the real-world schedule. It gives you the flexibility to have different user loads for different scripts which is not possible in the real-life schedule as it is shared equally. In the basic schedule, you have to manually pause the ramp-up whenever you want a particular user load to run whereas in the real-life schedule, this is kind of automated as you can define different ramp-up rates. You can not add, delete or modify the actions in the basic schedule mode.
- Real-world schedule: Real-world schedule can be used to emulate a real-life scenario where you have the load varying at different points of time. Example: If you want to ramp up 100 users first with a ramp-up of 5 users/10 sec and then after 2 mins you want to ramp in 10 more users but with a ramp-up of 10 users/10 sec. This can be done by clicking on the field marked * in the scheduler. This kind of scenario can be emulated using a real-world schedule. In a real-world schedule, you can change the number of users by changing the Vusers value in the Start Vusers section of the Scheduler.