
LoadRunner is well-known for its simplicity which makes performance testers’ lives easier. In the LoadRunner Scripting topic, we discussed the content check in detail. Even you got the information about the different types of content checks in LoadRunner i.e. Text Check, and Image Check along with the content check functions which are:
This article will brief you about the content check setting available under the runtime settings of LoadRunner. Using this setting you can enable or disable the content check in the script and also create some global rules which are applicable to all the transactions present in the script.
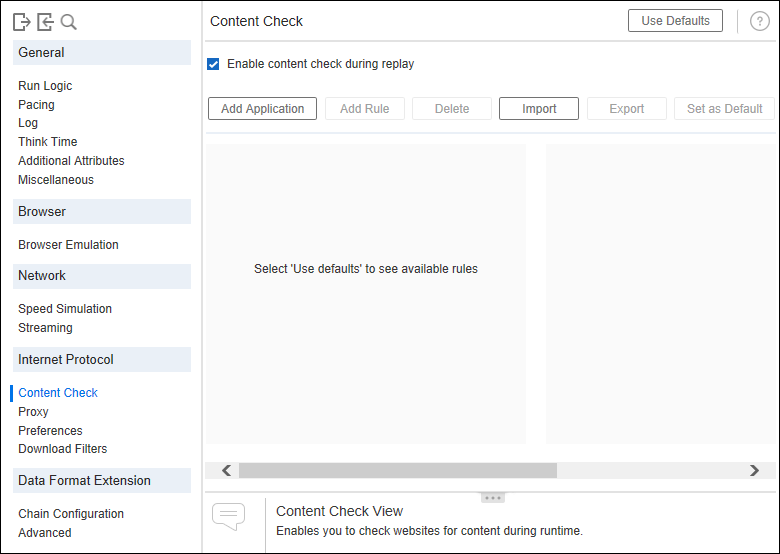
What are the settings available for Content Check in LoadRunner?
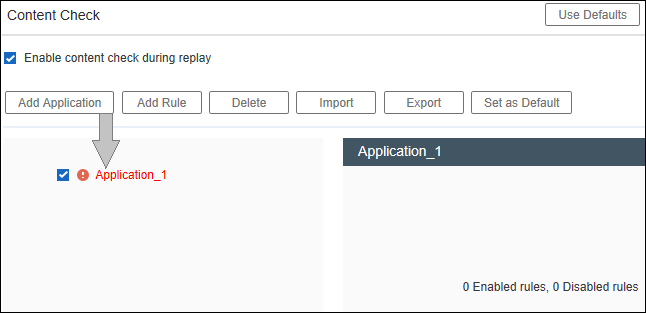
- Add Application:
This button will add an application in the tree pane with the default name Application_1. Change the default name and provide a unique name which belongs to the application. It helps to identify the content check setting when you export it.
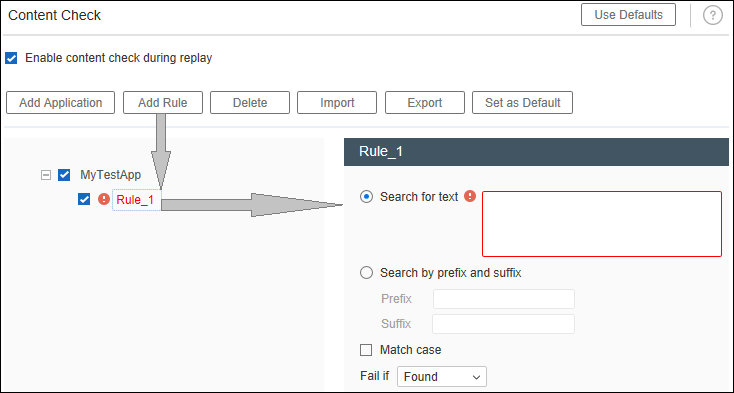
- Add Rule:
This button can add the content check rule under an application. You can add multiple rules under one application.
- Delete:
You can use this button to delete the application and rule. Select the application or rule (which you want to delete) and click the ‘Delete’ button - Import:
You can use this button to import existing content check rules - Export:
You can use this option to export the current rules. The rules can be exported in a .xml file. The content check rules can be easily exported and used in another script. This is a time-saver option. - Search:
You can search the text either by specifying the exact text or the boundary of the text.- Search for text: Enter the text which you want to match in the response
- Search by prefix and suffix: Enter the prefix and suffix of the text that you want to match in the response
- Match Case:
To make the text search case-sensitive - Fail if:
The action needs to be taken by LoadRunner when the text is found or not found.
How to add a content check rule in LoadRunner?
- Go to Runtime Settings
- Select ‘Content Check’ under ‘Internet Protocol’ category
- Click ‘Add Application’
- Rename the application name (optional)
- Click ‘Add Rule’ by selecting the application
- Rename the rule (optional)
- Select either ‘Search for text’ or ‘Search by prefix and suffix’ as per your need
- Add the text or prefix/suffix in the respective text field(s)
- Check/uncheck the ‘Match Case’ condition as per your requirement
- Set ‘Fail if’ condition ‘Found’ or ‘Not Found’ as per your requirement
Note:
- You can delete, import and export the rules using the ‘Delete’, ‘Import’ and ‘Export’ buttons.
- Click the ‘Use Defaults’ button to reset the setting.
Important Points:
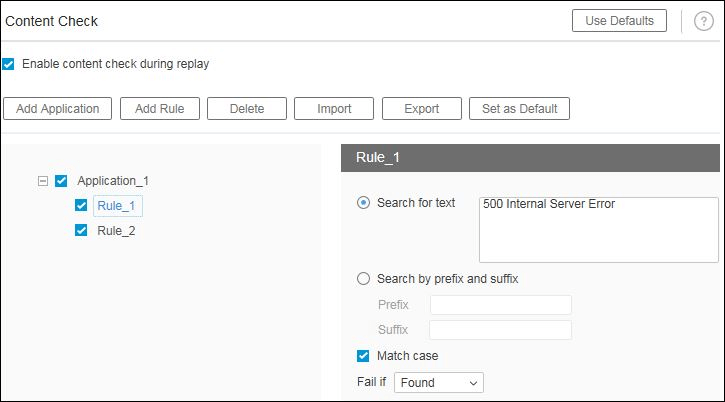
- The use of web_reg_find functions is good, but when you get an error LoadRunner reports it as “failed to find the text” instead of something more descriptive so that you can use the Content Check rule.
- You can always create rules for any error messages you find during scripting and, if you receive an error while running a scenario, you will add the error message from the snapshot in the scenario results directory.
You may be interested:
- Performance Testing Tutorial
- Performance Engineering Tutorial
- Apache JMeter Tutorial
- Neotys NeoLoad Tutorial