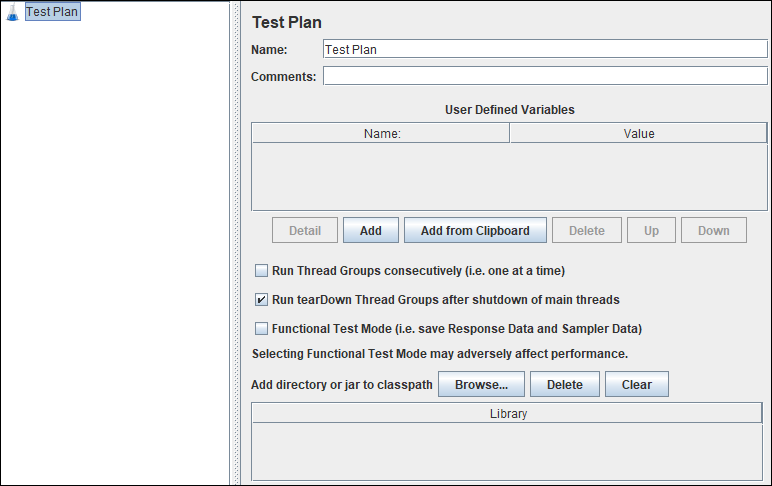
Test Plan is a Parent element in JMeter under which all other elements are attached. It is a default element. You can rename the test plan as per your project name or test case name; depends on the nomenclature which you follow. This will help you to differentiate your project, scenario or test case.
How to add the ‘Test Plan’ element in the JMeter script?
When you launch JMeter in GUI mode, you can see the default ‘Test Plan’ elements appear in the top left corner of the JMeter window. Refer to the below figure:

Since ‘Test Plan’ is a parent element, so you can not remove it. Although you can disable it by right-clicking on it and clicking the ‘Disable’ option.
Description of JMeter ‘Test Plan’ input fields:
‘Test Plan’ has the following input fields:
- Name: To provide Test Plan name. It could be the name of a project or test case.
- Comments: To provide a comment
- User Defined Variables: Static variables can be defined for values that are repeated throughout a test, such as server names.
- Run Thread Group Consecutively (i.e. one at a time): Check the box if you have multiple groups under the same test plan and want to run sequentially.
- Run tearDown Thread Groups after shutdown of main threads: Check the box if you want to run tearDown thread group.
- Functional Test Mode (i.e. save Response Data & Sampler Data): It is mainly used for debugging purposes. It saves response data for validation purposes.
Possible Parent Element(s):
- NA
Possible Child Element(s):
- Thread Group
- Config Element
- Non-Test Elements
- PreProcessor
- PostProcessor
- Assertion
- Timer
- Listener
- Test Fragment
Element(s) can not be added directly as a child element:
- Sampler
- Logic Controller
- Another Test Plan
You may be interested:

