
To make sure sites are seamless and robust, most companies turn to Network Load Balancing as a solution. This helps them to ensure that their service will remain operable – even when there are unexpected circumstances or failures in any of the instances. Using JMeter, such testing can be conducted with the help of the ‘DNS Cache Manager’ element which allows testing the applications, which have several servers behind load balancers like CDN (Content Delivery Networks) when the user receives content from different IP’s.
By default, JMeter uses JVM DNS cache. That’s why only one server from the cluster receives the load. The DNS Cache Manager element resolves name for each thread separately in each iteration so that load can be balanced by the load balancer. DNS Cache Manager sends requests which are independent of both JVM and OS DNS caches.

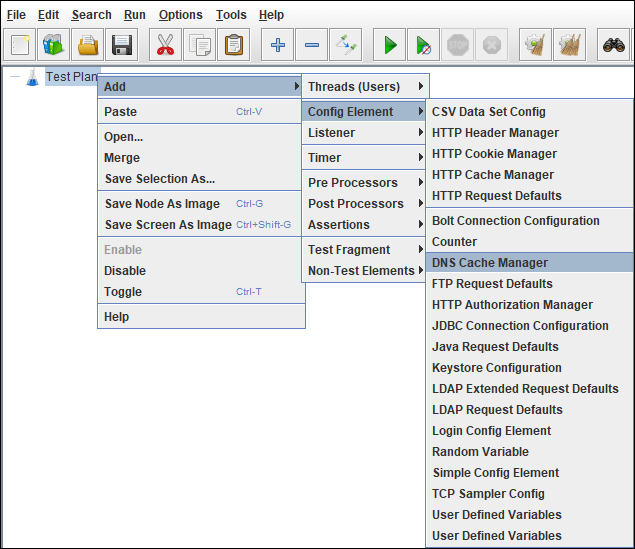
How to add ‘DNS Cache Manager’ in the JMeter script?
Follow the below steps:
- Select ‘Test Plan’ node
- Right-click on the ‘Test Plan’ node
- Hover the mouse on ‘Add’
- Hover the mouse on Config Element
- Click ‘DNS Cache Manager’
What are the input fields of ‘DNS Cache Manager’?
- Name: To provide element name
- Comments: To provide arbitrary comments (if any)
- Clear Cache Each Iteration: If selected, the DNS cache of every Thread is cleared each time when a new iteration is started. The DNS Cache Manager caches the IP address and DNS hostname pairs and returns the cached value if the DNS hostname has a match in its internal cache. If this checkbox is ticked, the cache will be cleared at the start of the thread.
- Use System DNS Resolver: The DNS Cache Manager will query DNS Server(s) defined in your OS network configuration in order to determine the hostname for each thread representing virtual users. In this case, you need to override the networkaddress.cache.ttl property in the $JAVA_HOME/jre/lib/security/java.security file and set it to “0” (the property defaults to “-1” which stands for “forever”)
- Use Custom DNS Resolver: You can specify one or more DNS servers in the list.
- If more than one server is provided, the DNS Cache Manager will choose a random one for each call – and will run as a round-robin mechanism.
- If nothing is provided, the system DNS resolver will be used (the DNS server/s defined in your OS network configuration)
- Hostname or IP address: You can provide list of DNS servers to be used during the test. If you have selected “Use Custom DNS Resolver” and keep the “Hostname or IP address” field empty then network configuration DNS will be used.
- Add: To add an entry to the DNS servers table
- Delete: To delete the selected DNS server entry
Some important Tips:
- Do not place DNS Cache Manager as a child element of a particular HTTP Sampler. The DNS Cache Manager should be added as a child of the Test Plan or a Thread Group element.
- DNS Cache Manager works only with the HTTP request using HTTPClient4 implementation.
You may be interested:
- Performance Testing Tutorial
- Performance Engineering Tutorial
- Micro Focus LoadRunner Tutorial
- NeoLoad Tutorial